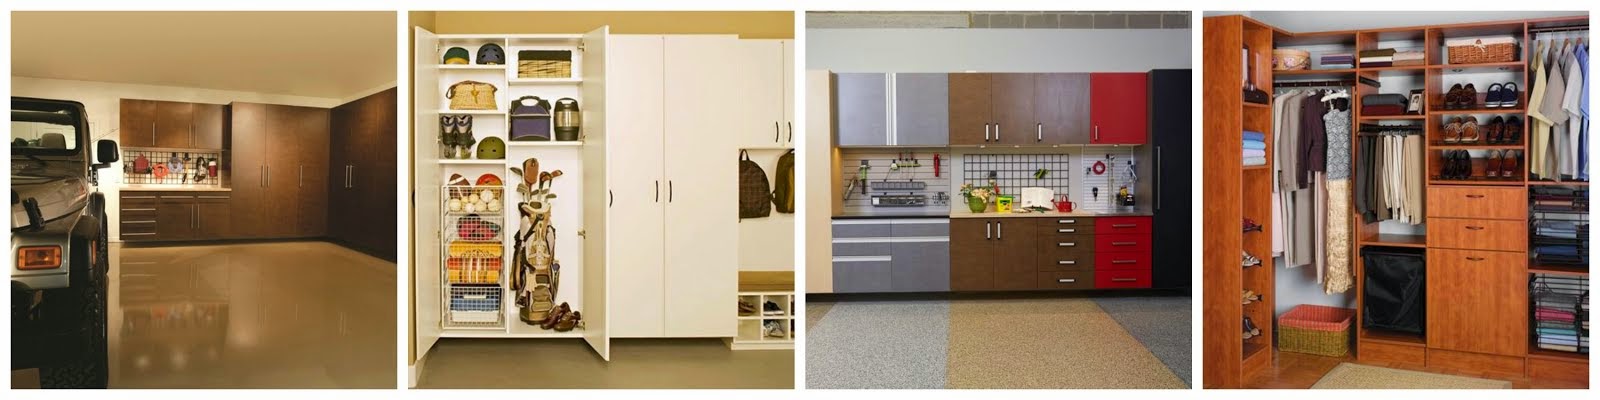
Custom Organizational Solutions

Showing posts with label home improvement. Show all posts

Tuesday, August 13, 2019

Feedback

Feedback
Take a moment to follow this link and leave us a review about your experience with us at Premier Garage Powered by Tailored Living - Foster City


Monday, April 1, 2019

Read This Before You Organize Your Garage

Read This Before You Organize Your Garage
 

The Big Clean-Out: Getting Started

 Organizing pros estimate that only 30 percent of us store our cars in the garage. The reason? Too much stuff. These garage storage ideas will help you get rid of anything you don't need.
• Set aside at least a full day, or even a full weekend or two, to get the job done.
• Make decluttering a family project and invite over a few friends to pitch in, and it'll go a lot faster.
• Go through absolutely everything, including boxes you didn't unpack when you moved in—you never know where that family heirloom might be lurking.

 • Sort all items into three piles: keep, donate or sell, and toss. Lay them on dedicated tarps or mark off areas of your driveway with chalk and place them there. What should get the boot: outgrown toys, items that are broken beyond repair, expired household chemicals (which may need special disposal), and anything you haven't used in two years or more. If you have a hard time letting go of things that have sentimental value, snap pictures as keepsakes.
• Sort the keepers into broad categories (for example, sports equipment, hand tools), and place them in well-marked cardboard boxes or, better yet, stackable clear-plastic bins you can use later. Put the keepers back in the garage for now.
• As soon as possible, donate giveaways and schedule a yard sale to get rid of castoffs. If you've got too much trash for your hauler to take, use a service such as Bagster (thebagster.com); simply buy the bag at a home store, pack it, and contact the company to schedule pickup and disposal (fees vary).


Store Elsewhere: Paint

 Extreme cold or heat can ruin it. Store cans in a more temperate area


Store Elsewhere: Propane

 A spark could ignite the fumes. Tanks should always be kept outdoors.

Store Elsewhere: Paper Goods

 They're a magnet for roaches and other bugs. Move them to your pantry.


Click the link for more info.->  https://www.thisoldhouse.com/ideas/read-you-organize-your-garage


Monday, March 25, 2019

How to Tile a Vanity

How to Tile a Vanity
 A tiled vanity top isn't reserved for a luxe lifestyle. Get this artisanal look in your home with our instructions.

A tiled vanity gives your bathroom a designer look without completely redesigning the whole room. If you plan to tile a bathroom wall, tiling the vanity will make the vanity and sink an integral part of the space.
Even if your existing base cabinet is in good condition, you'll have to build up the top. Commercial vanity countertops are made to handle less weight. Remove the top and add bracing, a 3/4-inch plywood base, and polyethylene waterproofing membrane.
Buy the tile for all the surfaces you'll be tiling — vanity tile, wall tile, and bullnose trim. That way you can be more certain of getting tiles of a consistent color throughout the entire project. Make sure the cartons have the same lot number.
Select the right tile to use on your vanity. Use glazed tile 3/8 to 1/2 inch thick. Purchase a sink whose texture matches the glaze — vitreous china and enameled cast iron are good choices. Self-rimming sinks are easy to install, and the rim will cover the rough edges of the cut tile.

What You Need

  • Circular saw
  • Cordless drill
  • Jigsaw
  • Level
  • Stapler
  • Notched trowel
  • Beater block
  • Straightedge
  • Caulking gun
  • Grout float
  • Drywall screws
  • 3/4-inch exterior grade plywood
  • Cement backerboard
  • Backerboard screws
  • Tile
  • Thinset mortar
  • 4-millimeter polyethylene or 15-pound felt
  • Grout
https://www.bhg.com/home-improvement/kitchen/installation-how-to/how-to-tile-a-vanity/

Monday, February 11, 2019

See Your Space in 3D


During your in-home consultation, your local designer will use D'Vinci, our proprietary 3D design software. In real time you’ll see your design come to life, modifications will be made instantly, and colors and finishes will be switched until it’s just right.

To experience the magic of D'Vinci, drag the orange triangle to view a photo-realistic 3D rendering and final installation image for comparison. You’ll truly love what you see!

Friday, October 12, 2018

The Tailored Living Design Process

The Tailored Living Design Process


 If you have heart palpitations every time you hear the word “organization” or “storage,” you may need professional help! From custom closet design to cabinetry Tailored Living’s designers have helped thousands of organizationally-challenged people get control of household clutter with custom-designed storage solutions for every room in the house. So whether you are looking at custom home office design or to organize your laundry room we’ve got you covered. Our proven storage design process breaks the seemingly overwhelming task into small, manageable segments, putting you in control.

Friday, September 14, 2018

Decorative Texture flooring

Our decorative Texture flooring is available in 18 standard decorative chip color blends, depending on your preference. You have the option of blending chip colors to create a floor that is uniquely your own. Time to get creative!

Friday, August 3, 2018

How to Apply Epoxy Flooring Paint to Your Garage

How to Apply Epoxy Flooring Paint to Your Garage

Evaluate your garage floor

Garage floor epoxy flooring is a tough, long-lasting coating that you paint onto the concrete. An epoxy garage floor resists grease, oil and many other substances that would ruin ordinary paint. Garage floor epoxy paints clean easily and can be found in a variety of colors (if you look hard enough), so you can keep your garage floor paints sparkling clean and attractive for years.
However, the reality of this challenging project is, one, not all concrete floors will hold epoxy floor coatings, and two, preparing concrete for epoxy floor coatings can be labor intensive and tedious. That said, this story will help you assess your concrete’s condition, show you how to clean and etch it, and demonstrate how to apply an epoxy garage floor coating that will handle car traffic, chemicals, oils, salt and scraping better than any other paint or stain.
As with any other paint job, success with using garage floor paints lies in the prep work. Plan to spend the first day removing oil spots, cleaning/degreasing the floor, etching it with a mild acid, and scrubbing, vacuuming and rinsing (a lot!). Day two is for filling cracks and applying the first coat of epoxy flooring, which is followed by a second coat on day three. This job doesn’t require many special tools. But to do the best job (and save your back), we recommend that you rent a walk-behind power floor scrubber (Photo 2) with a stiff brush attachment. Brushes work better than scrubbing pads on concrete, but buy two pads if a brush isn’t available. Also, rent a wet vacuum if you don’t own or have access to one.

Analyze the floor and weather

Before you even consider an epoxy garage floor, test to determine if dampness is coming up through the concrete from the ground. If moisture is evident, your floor isn’t suitable for epoxy. Also, forgo the project if a concrete sealer was previously used (you’ll know a sealer has been used if water beads up when applied to the surface). If you’re dealing with a new slab, you must wait a minimum of 28 days, preferably two months, for the floor to cure and dry thoroughly before applying a epoxy flooring. And if you’re dealing with a previously painted floor, the best advice is to remove the paint, especially when you’re applying a solvent-based epoxy garage flooring paint that could soften any that remains.
If your concrete passed these tests, make sure the weekend weather passes, too. The temperature of the concrete must be a minimum of 55 degrees F, with an air temperature between 60 and 90 degrees for optimum garage floor epoxy curing/drying.

Floor cleaning


To begin, use a flat-edged shovel or scraper to loosen hardened surface debris, then sweep it out with a stiff-bristle garage broom.
Next, mix up a 5-gallon batch of water and concrete cleaner/degreaser according to label directions (found at home centers and hardware stores).
Once spots are cleaned, power-scrub the entire floor (Photo 2). To clean a two-car garage floor, plan on scrubbing for 20 to 30 minutes (keep the floor wet at all times). Make sure you scrub with a stiff-bristle hand brush along the walls and in the corners where the machine cannot reach. Once you’re satisfied with dirt removal, vacuum up the cleaner for proper disposal (Photo 3). Don’t just wash the product down the drive into the storm sewer. The environmental effects of cleaning products can vary widely. Check the product label or call the manufacturer for the proper waste disposal method. We looked up the Material Safety Data Sheet for the product we used (made by Behr) on the website www.msdssearch.com and learned we could pour the waste into the “sanitary sewer” (toilet). Also check the label or call the manufacturer for instructions on safe disposal of all leftover product and containers. When in doubt, call your city or county environmental office.

Etch the concrete with muriatic acid


Before etching concrete with the acid solution (Photo 4), hose down your entire driveway and several feet beyond the sides of the drive. This aids in the final rinse out of the garage so the material will flow more easily down the driveway. Now sprinkle the 10:1 ratio of water to muriatic acid mixture and power-scrub the floor (with a rinsed brush attachment or new pad; Photos 4 and 5).
When you’re finished, take your hose and nozzle end and flood the floor with water, spraying the material out of the garage for a good 10 minutes (diluted muriatic acid can be rinsed with large volumes of water into a storm sewer, according to the manufacturer). Rinse off the power scrubber brush/pad, then scrub the wet floor one last time for 5 to 10 minutes.
Finally, rinse out the entire floor and driveway two to three more times. The concrete surface should now feel like fine-grit sandpaper. If not, you need to repeat the acid washing. Finally, to speed the drying process, squeegee out any remaining pooled water, and take a rag and dry any remaining spots, cracks or chipped areas. Leave the garage door open overnight to speed drying during the epoxy floors project.

Choosing an epoxy floor coating

The final critical decision is what type of garage floor epoxy paints to use. Epoxy floor paints are tough resins that come in two separate parts that you mix together just before you apply them. You can divide them roughly into three types: 100 percent solids, solvent based and water based.
The 100 percent solid type is almost pure epoxy; it doesn’t contain solvents that evaporate. These products are expensive and difficult to handle because they harden so rapidly. They’re best left to the pros.
The solvent-based epoxies typically contain from 40 to 60 percent solids (epoxy). They penetrate and adhere well and are the choice of most pros. And they’re often available in a wide range of colors, which is one reason we chose this type for our demonstration. But they do have some drawbacks. The solvents are powerful and potentially hazardous; you MUST use a respirator (a 3M 5000 series respirator with an organic vapor/acid gas filter, or the equivalent in another brand). The respirator must fit tightly to your face so you don’t breathe the fumes. In addition, you must ventilate the garage well and keep other people away from the odors.
Solvent-based epoxy floor coating also may be harder to find. Some paint specialty stores may carry them (Sherwin- Williams and ICI Dulux, among others), but otherwise you’ll have to go to an industrial supply–type store. Check the Yellow Pages under “Paint, Wholesale & Manufacturers” or “Industrial Equipment & Supplies,” or look online.
The water-based epoxies also have two parts that you mix just before application. And they also typically contain 40 to 60 percent solids. The benefit of this type of epoxy floor coating is that there are no hazardous solvent fumes. And at least one brand, Rust-Oleum’s EpoxyShield Garage Floor Coating, is widely available at home centers.
Whether you’re working with solvent- or water-based epoxy, we recommend that you apply two coats to get enough build for long-term wear and durability. “Build” refers to the thickness of the dried epoxy film. Typically, an epoxy with a higher solid content will give a higher build. And, in general, prices tend to reflect the amount of epoxy in the mix—the more epoxy, the higher the build and the higher the price.
For a two-car garage (450 sq. ft.), you’ll need 2 to 3 gallons per coat (depending on the percent of solids in the epoxy you buy—read the container). Check the cans for coverage to make sure you buy enough.

Patch the cracks

First thing in the morning, after the floor has dried overnight, fill 1/4-in. cracks and larger, plus holes or spalled areas, with an epoxy crack filler, available at home centers. Use a plastic putty knife to scrape the surface level and smooth. Let this dry for four hours (check label directions) before you begin garage floor painting your first coat of epoxy.

First coat of epoxy


Mix the correct amount of epoxy (Photo 6) to cover the square footage of your garage floor according to label directions. It’s critical that you allow the mixed product to stand undisturbed for the specified time on the label before applying it. You also must apply the entire batch you mixed up before the specified time expires. We used a 40 percent solid, solvent-based epoxy from a local industrial supplier/manufacturer that had to sit for 30 minutes, and the batch had to be used up within 24 hours (and it was offered in almost 20 colors).
While waiting for the crack filler to cure, use a high-quality natural-bristle paint brush and cut in the floor edges (Photo 7). Also, tape the area directly underneath the garage door with masking or duct tape, allowing you to shut the door overnight. This is intended to keep out dust, dirt, pets and children until the floor is dry. And put a “Do Not Enter” sign along with tape across the doorway leading to the garage from the house.
Coating the floor
If you move at a steady pace , you should finish your two-car garage floor epoxy in less than one hour. (Remember not to paint yourself into a corner!) The solvent odors are powerful. Be sure to wear a respirator and keep the garage door open at least an hour after coating.

Let the first coat of your garage floor epoxy dry overnight, for a minimum of 16 hours (or according to label directions, since epoxy products vary). Add a non-skid product to the epoxy (Photo 10) for the second coat, especially if your vehicles drag snow and moisture into the garage, or you’d feel safer on a less slippery floor. Repeat the “cutting in” and garage floor painting like the day before (Photos 7 – 9).
Wait another 16 hours (check label directions) after finishing your garage floor epoxy before allowing foot traffic. You can start parking your cars on the floor after approximately three to seven days (depending on the epoxy label directions). A full cure for the floor takes approximately one month.
 

Friday, June 1, 2018

5 Strategies for Organizing Your Pantry

5 Strategies for Organizing Your Pantry 


1. Invest in clear containers and a labeler.

This storage solution is especially helpful for bulk-bin items, like rice, grains, and nuts. With neatly labeled clear containers, gone are the days of having four partially open bags of quinoa.
2. Assess your pantry on a weekly basis.

Keeping your pantry organized and in good shape doesn't have to be a huge, time-consuming task. Instead, make it part of your weekly meal-planning routine by taking a few minutes to do a quick inventory. Knowing what's in there is the best way to make sure you're cooking and eating what you already have, and avoid buying multiples of the same thing.
3. Use sheet pans to group like with like.

Heavy-duty and multipurpose, sheet pans and hotel pans make especially good organizers. Not only do they make grouping like ingredients together easy, but they're also a great way to contain any inadvertent spills or leaks.
4. Take 10 minutes every day to keep your pantry clean and tidy.

A few everyday tasks that take just a few minutes — like wiping down pantry shelves, keeping package labels facing outward and visible, grouping like items together, and tossing expired items — will leave you with an always-tidy pantry.
5. Make use of household items to give your pantry more storage space.

From crates and space-saving racks to pencil holders and magazine racks, household items can be a smart and inexpensive way to add even more storage to your pantry. If everything has a special place or holder, you'll be less likely to mess it all up when looking for that one can of beans you're sure you bought three weeks ago.

https://www.thekitchn.com/5-strategies-for-organizing-your-pantry-and-keeping-it-that-way-224037


Tuesday, January 23, 2018

Oohs and Aahs


Garage enhancement is a growing trend, fueled by consumers looking for creative ways to add space to their home’s usable living areas, as well having an enviable garage for all the neighbors to see. How much more satisfying to hear “oohs and aahs” from passing neighbors when the garage door is up versus a muttered “tsk, tsk” at a cluttered, disorganized garage.

If you want a garage that will have the neighbors talking about you in a good way, start with a PremierOne Stratus garage floor coating that will give your garage the ultimate in high-end garage floor design. Created from a mix of two or more colors of marbleized epoxy floor coating swirled together to form an abstract pattern, the high-gloss artisan finish looks like molten metal, often referred to as a metallic finish. Since the unique pattern is created while the floor is being installed, it’s guaranteed that there will never be another floor exactly like it!

Monday, December 18, 2017

Natural Beauty

The natural beauty of granite has made it a popular choice for decorators and homeowners for many years. Granite is useful for all kinds of applications, including kitchen counter tops and islands, bath vanity tops, backsplashes, sinks or basins, fireplace mantles, decorative medallions (mosaics) and flooring. If you love the look of granite for a garage floor but can’t justify the expense of the real thing, a PremierOne Stone garage floor coating can give you the same look at much less cost. A sister product to PremierOne Decorative Texture, PremierOne Stone is created with 1/4” chips to produce the textured, natural stone appearance of granite in six trending colors for your garage floor. Color choices include Blackburn, Bona, Denali, Grey’s Peak, Hubbard, and Sanford, as well as the option of custom color blends.


Monday, November 20, 2017

Through Every Step.


Tailored Living featuring PremierGarage is well-known for using the latest 3D design software to show you what your storage solution will look like before you sign anything. At Tailored Living we are proud to work with you through every step, from design and measuring to installing the final product. From custom cabinets to epoxy garage flooring, we will take care of every detail so all you need to focus on is enjoying your home storage solution. Veny and Nick’s independently owned and operated business strives to help you live your life a bit more organized.

Friday, September 8, 2017

We'd Love to Hear What You Think

Tailored Living® featuring PremierGarage® has the strength of 20+ years of franchising experience behind it as one of the family of brands of Home Franchise Concepts (HFC). Each of our independently owned and operated franchise locations provides the very best in high-quality storage and home organization systems for homes and businesses. Through free, in-home or on-site consultations, expert measurement, innovative design and professional installation, your home or business transformation is custom-tailored to your needs and specifications.

We'd love to hear what you think of our garage remodeling service! Let us know here

Friday, August 18, 2017

High Quality Products and Materials


  • Cabinet and closet construction panels are moisture resistant, guaranteed not to peel at the edges, whether a laminate finish, wood veneer or Italia glazed finish.
  • Our PremierOne® hybrid polymer garage floor coatings are industrial-grade and twice as hard as traditional epoxy floor finishes. Moisture and spill resistant, the finishes will not chip, crack or fade.
  • Our specialty line of eco-friendly sustainable materials, UltraBlend™, is certified as an Environmentally Preferable Product by Scientific Certification Systems.
  • We install genuine Murphy Beds with patented steel frames and technologically advanced hardware for worry-free operation.

Friday, July 21, 2017

On-Site 3-D Modeling


Each customer will receive an on-site / in-home 3D garage consultation. We will work with you to design the garage that now only fits your budget, but fits your lifestyle. For more information or to setup your consultation, follow this link!

Friday, May 19, 2017

You're in Control!

Our proven storage design process breaks the seemingly overwhelming task into small, manageable segments, putting you in control.

Step One:  Find the Tailored Living designer in your area to schedule a free, in-home consultation.
Starting with a preliminary discussion to determine your needs makes the in-home consultation to go smoothly and ensure that time spent is maximized.


Step Two: The free, in-home consultation
Your designer will spend time in your home discussing your space needs and multiple design options for custom, effective storage solutions that will help you meet your organizational goals.


Step Three: The final decision
Once you’ve finalized your design, you’ll receive a written estimate, detailing everything about your order.

Step Four: Behind the scenes
This is designer territory.


Step Five: Installation and celebration
Tailored Living professional installers arrive on time with everything they need to do full installation.

Friday, May 12, 2017

Heart Palpitations?

If you have heart palpitations every time you hear the word “organization” or “storage,” you may need
professional help! From custom closet design to cabinetry Tailored Living’s designers have helped thousands of organizationally-challenged people get control of household clutter with custom-designed storage solutions for every room in the house. So whether you are looking at custom home office design or to organize your laundry room we’ve got you covered. Our proven storage design process breaks the seemingly overwhelming task into small, manageable segments, putting you in control.
Step One:  Find the Tailored Living designer in your area to schedule a free, in-home consultation. Starting with a preliminary discussion to determine your needs makes the in-home consultation to go smoothly and ensure that time spent is maximized.

Step Two: The free, in-home consultation
Your designer will spend time in your home discussing your space needs and multiple design options for custom, effective storage solutions that will help you meet your organizational goals.

Step Three: The final decision
Once you’ve finalized your design, you’ll receive a written estimate, detailing everything about your order.

Step Four: Behind the scenes
This is designer territory.

Step Five: Installation and celebration
Tailored Living professional installers arrive on time with everything they need to do full installation.